
Internet of Things (IoT) developers often need to implement a robust mechanism to manage the state of IoT devices locally or remotely. A typical example is a smart home heater. In this IoT device, you can use the built-in control panel to adjust the temperature (device status) or remotely trigger temperature control messages from a cloud-based application.
You can quickly build this mechanism using the AWS IoT Device Shadow service. This service can make the device state available to your business logic, even in the event of an intermittent network connection.
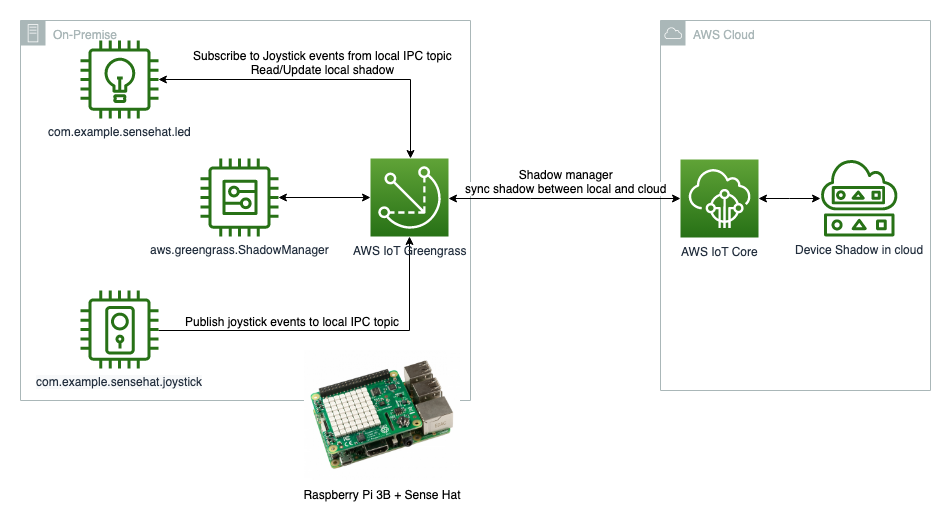
In addition, you can use AWS IoT Greengrass with its off-the-shelf components to efficiently manage the device software lifecycle and speed up development. AWS IoT Greengrass is an open-source runtime environment and cloud service for developing, deploying, and managing device software. One of the components of AWS IoT Greengrass is Shadow Manager, which enables a local service on your primary device. The local shadow service allows components to interact with local shadows via inter-process communication (IPC). The shadow manager component manages the storage of local shadow documents and also handles the synchronization of local shadow states with the AWS IoT Device Shadow service.
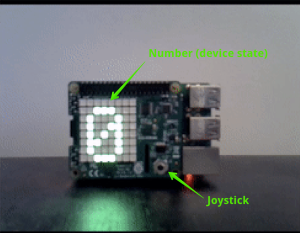
In the following article, the authors use the AWS IoT Device Shadow service, AWS IoT Greengrass, Raspberry Pi, and Sense HAT hardware to simulate a smart home heater. This demonstration simulates the power output using a single-digit number (0 - 9). This number is the state of the device we want to manage from anywhere, local or remote. The user can change this number using a local hardware switch (joystick built into the Sense HAT) or remotely from a cloud-based application.
The Raspberry Pi shows a number on the Sense HAT's LED display, indicating the heater's output. The user can press the joystick on the Sense HAT to increase the number (or press down to decrease it).
Following this article, you can quickly start creating and testing IoT device state management solutions anywhere.
Prerequisites
To follow the content of this article, you will need:
Computer hardware
- A Raspberry Pi (This demo uses a Raspberry Pi 3B)
- A Raspberry Pi Sense HAT
Software
- A Raspberry Pi OS (64-bit) installed on the Raspberry Pi
- A Sense HAT SDK installed on the Raspberry Pi
- AWS account and access rights to AWS IoT Core and AWS IoT Greengrass
Guide
Step 1: Install and configure the AWS IoT Greengrass core software on your Raspberry Pi.
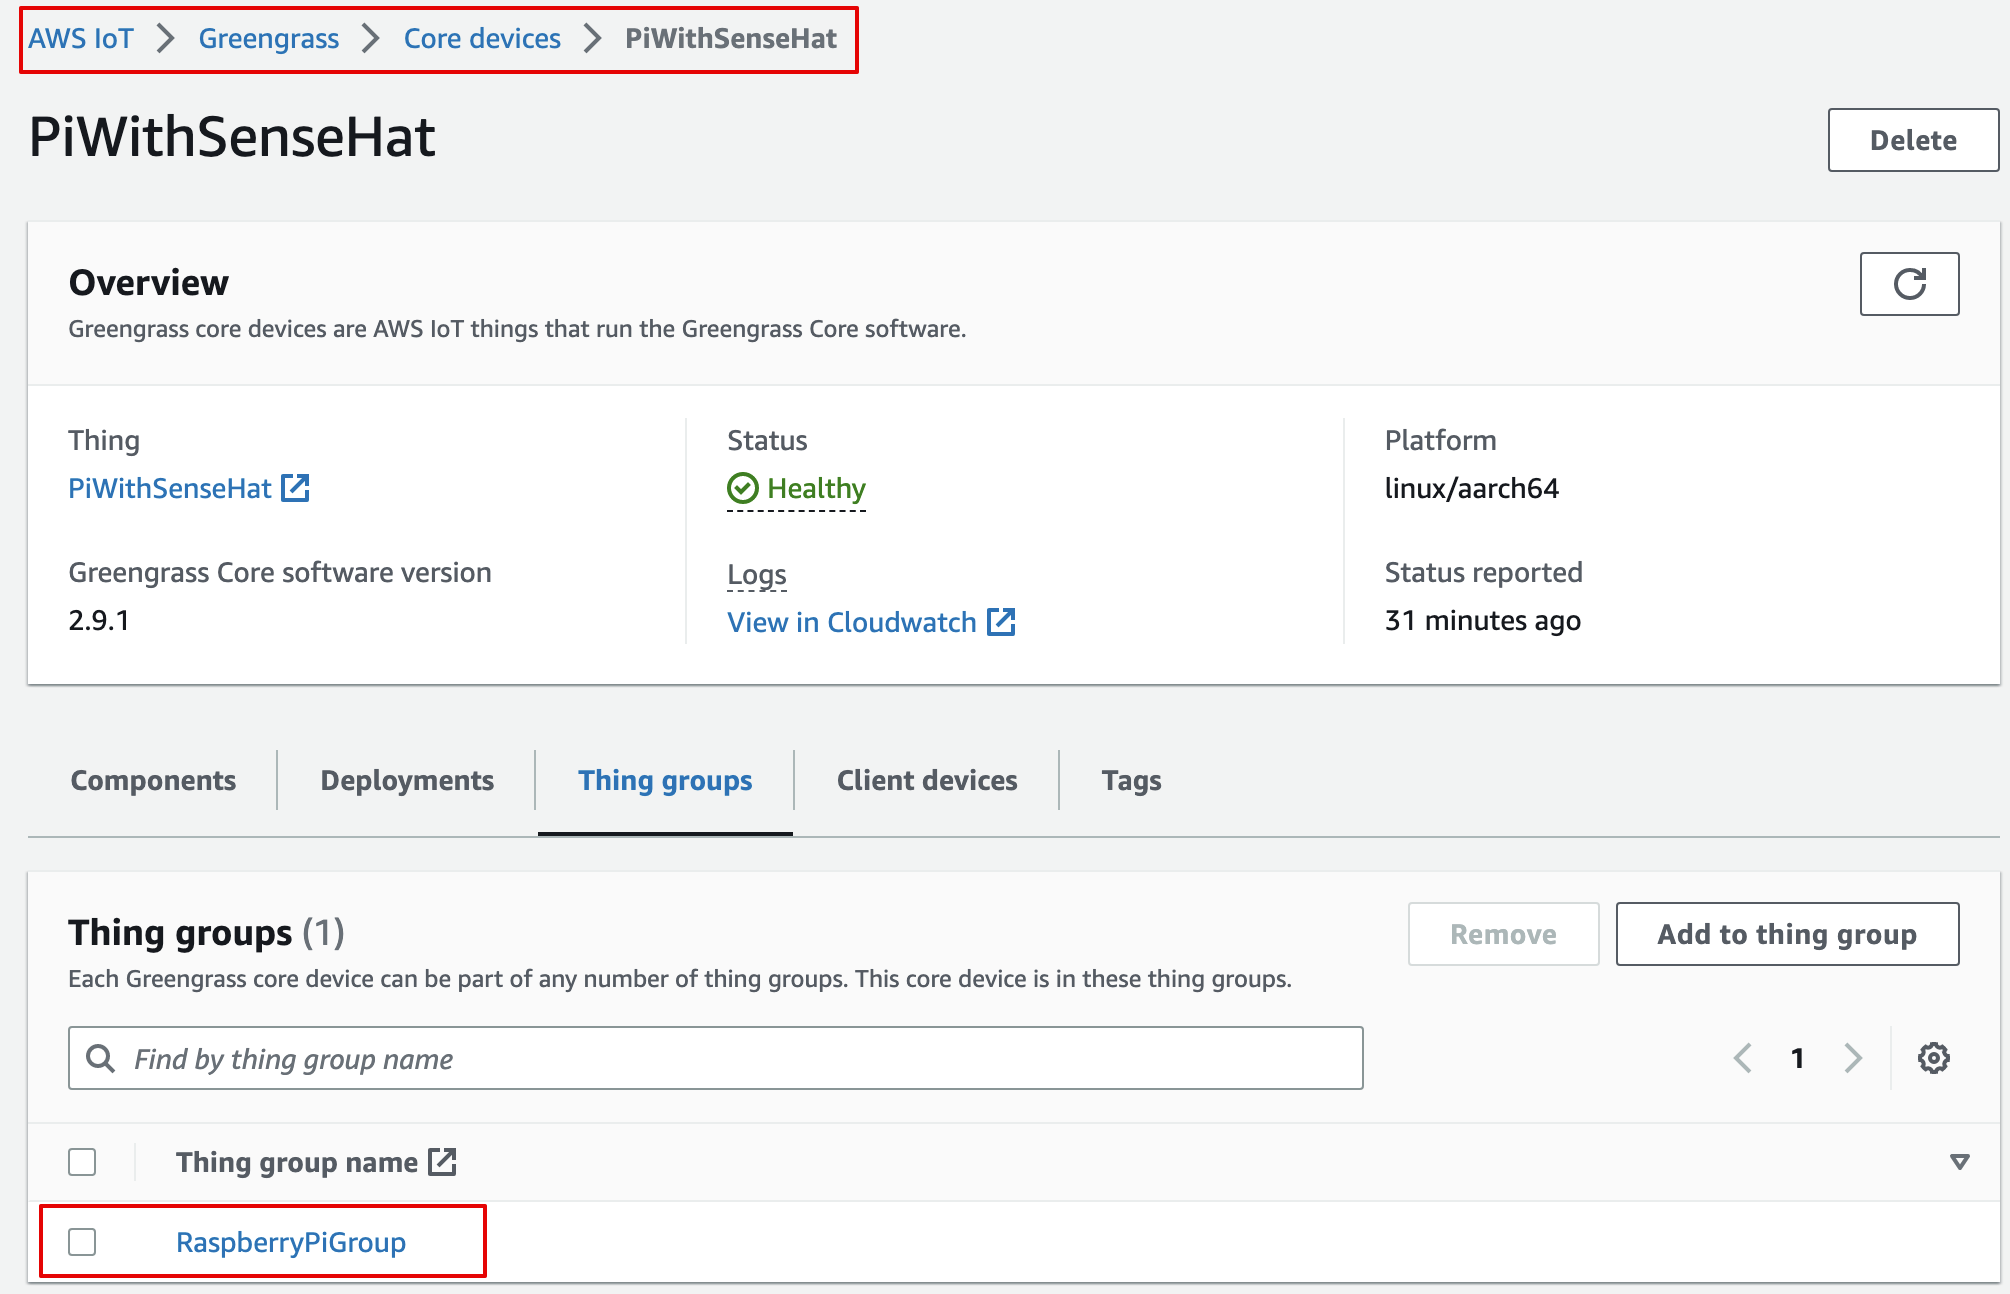
To make your Raspberry Pi a core AWS IoT Greengrass device, follow steps 1 to 3 in the Introduction to AWS IoT Greengrass document. The authors have created a device with the following configuration:
- Core device name: PiWithSenseHat
- Thing group: RaspberryPiGroup
You should now see this device in the AWS console.
Step 2: Deploy AWS IoT Greengrass ready components on the device
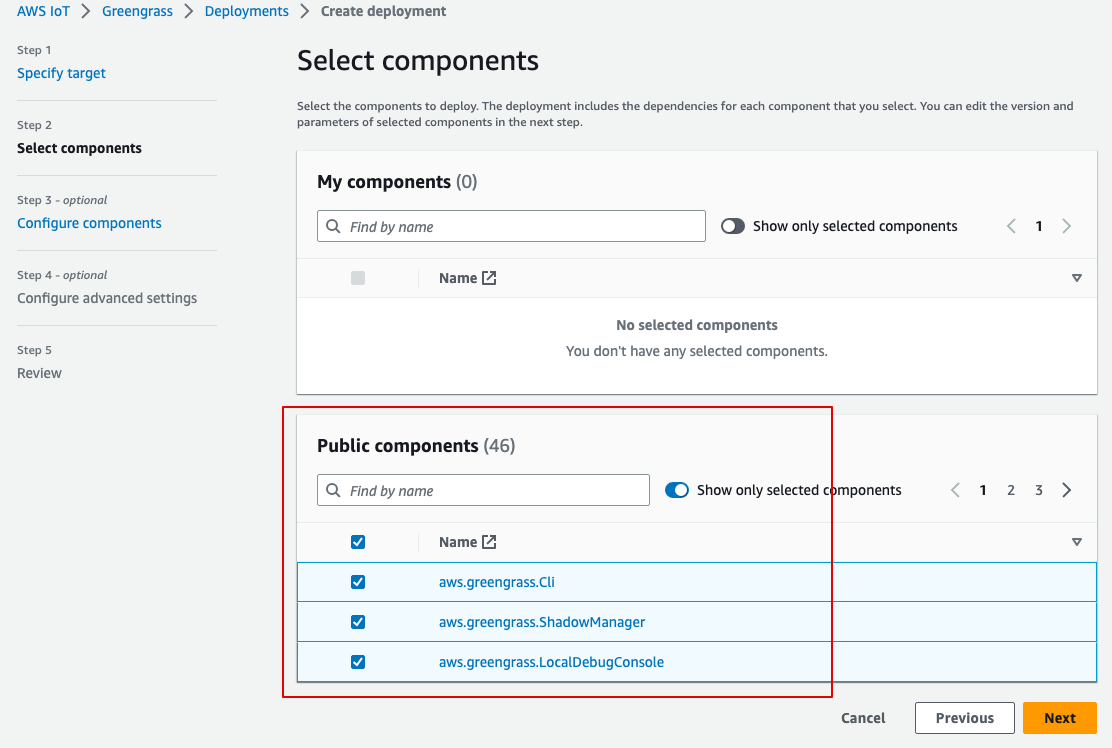
The next step is to deploy the ready-made AWS IoT Greengrass components on the device. AWS IoT Greengrass provides and maintains a set of ready-made components that can accelerate development. In this demonstration, the following components are implemented:
- greengrass.Cli -Provides a local command line interface that can be used on primary devices to develop and debug components
- greengrass locally.ShadowManager - Activates a local shadow service on your primary device and handles the synchronization of local shadow states with the AWS IoT Device Shadow service
- greengrass.LocalDebugConsole (optional) - Provides a local dashboard that displays information about your primary AWS IoT Greengrass devices and their components
Steps:
- Go to AWS IoT Greengrass console
- Go to Deploy to Greengrass devices, create a new deployment
- The deployment destination can be a Thing RaspberryPiGroup or a Core device
- Select these 3 components from Public Components
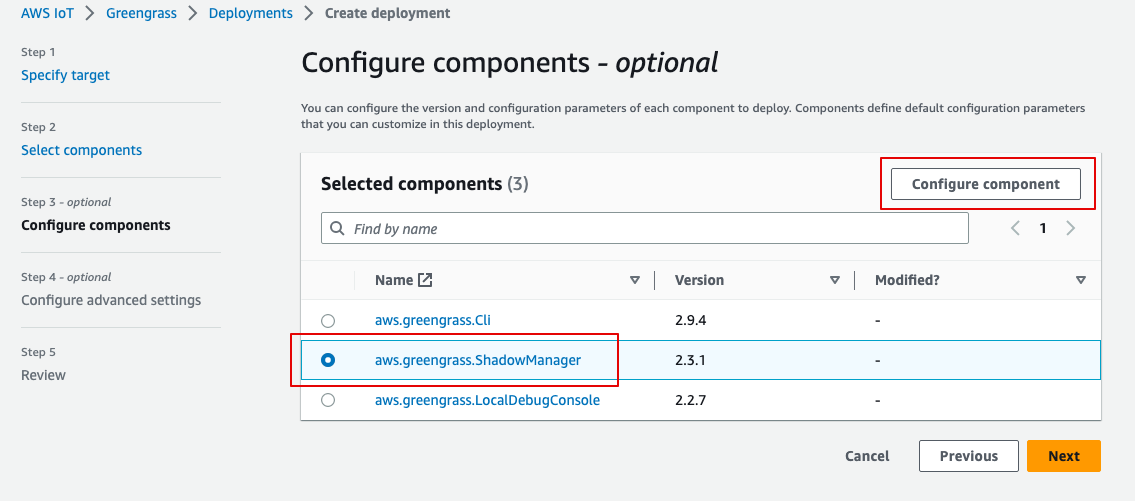
- Configure the aws.greengrass.ShadowManager component
In the Configure Components step, select aws.greengrass.ShadowManager and then click Configure Component.
6. Configure the component version and configuration json file aws.greengrass.ShadowManager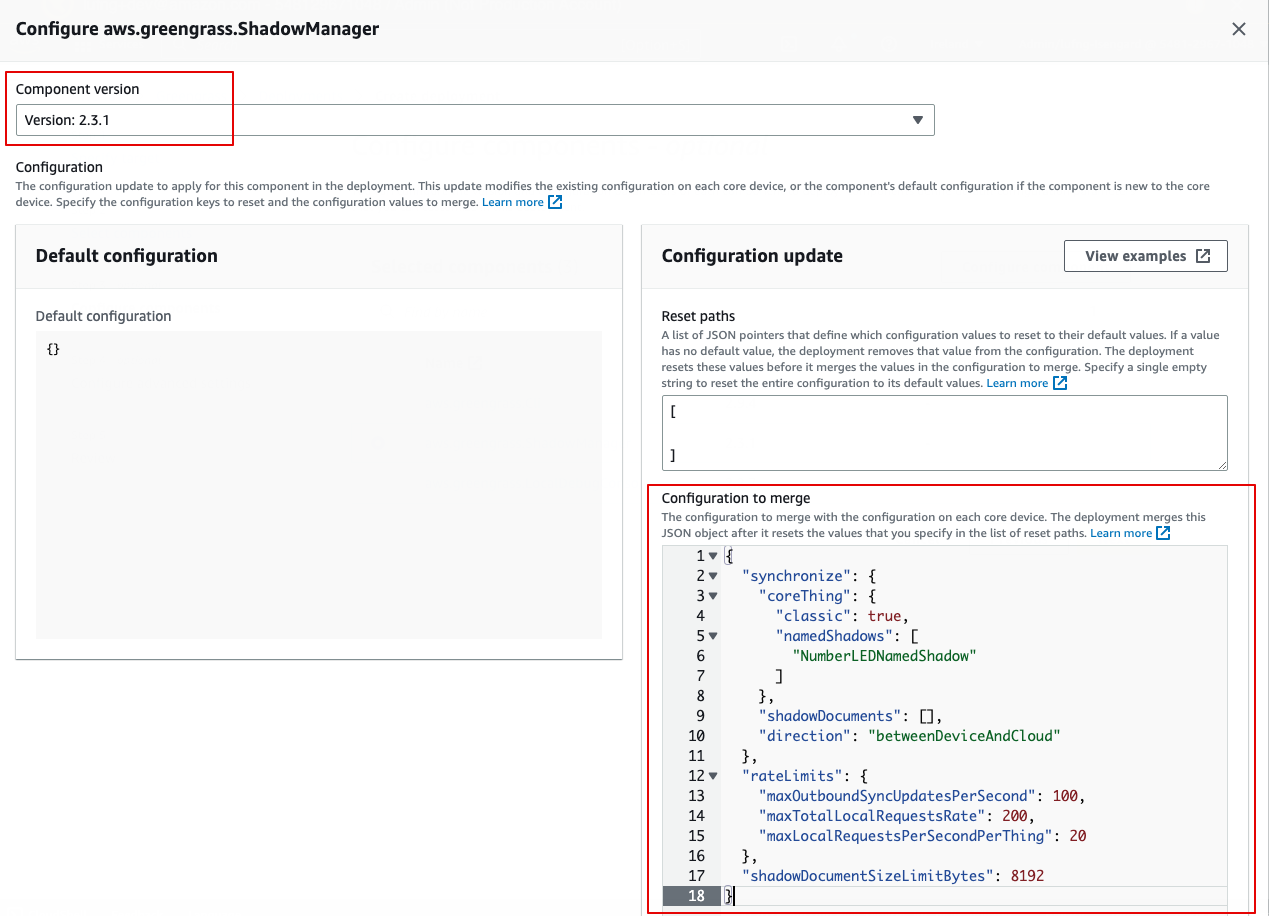
- Version: 3.1
- Configuration to merge:
JSON
The configuration JSON synchronises the named shadow, in this example named NumberLEDNamedShadow, in both directions between theDeviceAndCloud option. In your actual application, you can use multiple named shadows and one-way or two-way synchronization. Check out the details of aws.greengrass.ShadowManager in its document.
7. Complete the deployment wizard to complete the deployment.
At the end of Step 2, the Raspberry Pi is ready to synchronize the NumberLEDNamedShadow between the device and the cloud using Greengrass' essential AWS IoT software and the finished component.
Step 3: Create AWS IoT Greengrass components to simulate a smart home heater with local control
Two AWS IoT Greengrass components will be created to simulate a smart home heater with local control. You can use inter-process communication (IPC) for internal communication between the components. If you don't know how to build custom AWS IoT Greengrass components, follow step 4 in Getting Started. For this article, the authors create and test them locally.
1. Component example.sensehat.joystick: capture events from the joystick and publish them to the IPC topic 'ipc/joystick' (it was defined as a variable in the recipe).
2. Element example.sensehat.led: subscribe to the IPC topic "ipc/joystick", update the local shadow and LED Sense HAT display.
3.1 Create component com.example.sensehat.joystick
This component publishes embedded joystick events to the AWS IoT Greengrass IPC core. The event is:
JSON
{
   "timemillis":1669202845134,
   "direction":"down",
   "action":"released"
}
The component recipe and artifact are in the blog's source code repository. Instead of hard-coding the IPC theme in the source code, it is defined as a variable in the recipe.
3.2 Create the com.example.sensehat.led component
Create a second component called com.example.sensehat.led. The component recipe and artifact can be found in the source code repository. The recipe specifies the IPC and shadow document access permissions.
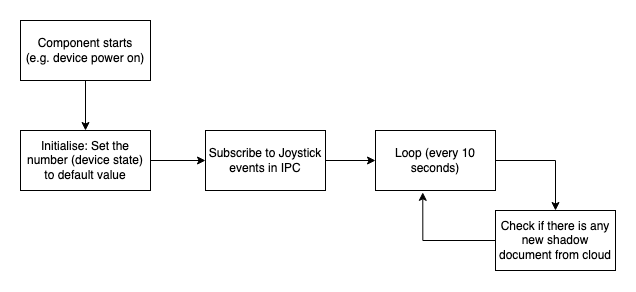
This component:
- Maintains a number as the device state and displays it on the LED
- Subscribes to the joystick event topic via the IPC
- Increases/decreases the number based on the received joystick event
- Periodically checks the shadow. If a new number appears in a background document, update the device with that number.
Demo: Manage the state of your device in action
Now the Raspberry Pi as a simulator is ready for use.
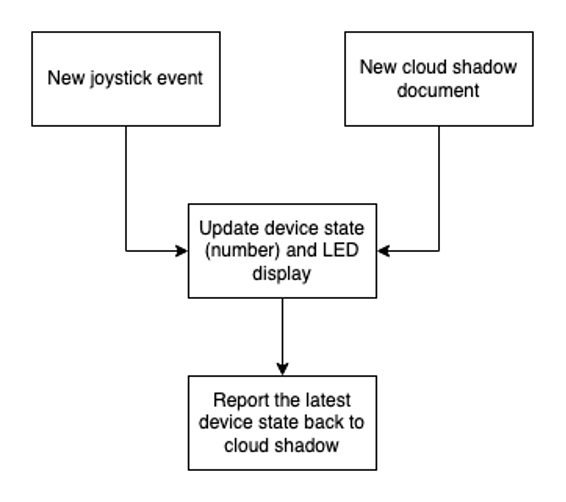
It reacts to 2 types of events:
- New joystick event: control the device locally
- New cloud document: control the device remotely
To see your device shadow in action:
- Go to the AWS IoT Greengrass console
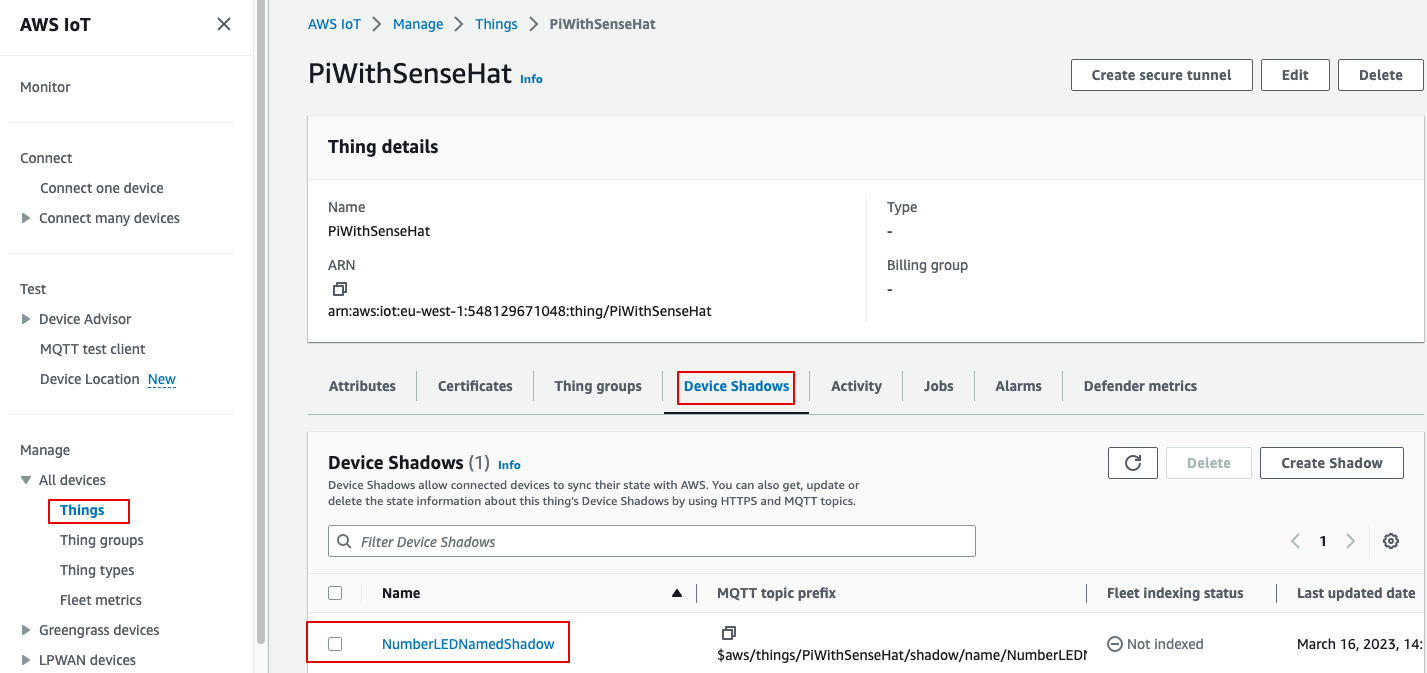
- Go to Things, select PiWithSenseHat
- In Device Shadows, you can find NumberLEDNamedShadow. Note that you do not need to create this shadow manually. When the device first reports the shadow, it will create it for you if it doesn't have one.
Demo 1: Update your device locally using the joystick
- Use the joystick to increase/decrease the number locally (The initial number is 6. It was first decreased to 0 and then increased to 2).
- Watch as the background document on the device is updated in real-time in the AWS console. The change is synchronized with the real-time cloud shadow.
- The status is changed to "device updated locally"
- the number is changed to the new value from local
Demo 2: Remotely updating a device by updating a document in the background of the device in the cloud
- At the start of this demonstration, the device LED was displaying 0
{ "state": { "desired": { "number": 0 }, "reported": { "status": "device is updated by local", "number": 0 } } } - In the AWS IoT Core console, edit the background document with the following JSON (you can skip the "reported" section), then click Update.
{
  "state": {
    "desired": {
      "number":9
    }
  }
}
3. Watch as the Raspberry Pi's LED updates the number. The change is transmitted from the cloud to the local device. The device now displays the number 9:
- status is changed to "device updated by shadow."
- the number changes from 0 to 9.
The display number can be updated using the local joystick or remotely from the AWS console, and the latest update takes precedence. Therefore, when the update is performed locally, it is important to set the 'desired' value back to the remote shadow in the cloud so that the remote shadow knows the new 'desired' value and does not update it in the next background sync cycle. See more in the device-shadow-empty-fields document.
Ordering
Remove/disable the IAM user you used to install the basic AWS IoT Greengrass software on the Raspberry Pi
In the AWS IoT console, navigate to Greengrass devices
Select the PiWithSenseHat device in Core Device and press Delete in the top right corner.
In the Thing groups, remove the RaspberryPiGroup
Remove these two custom components from the Raspberry Pi
Run the following commands in a terminal on the Raspberry Pi
sudo /greengrass/v2/bin/greengrass-cli --ggcRootPath /greengrass/v2 implement create --remove "com.example.sensehat.led"
sudo /greengrass/v2/bin/greengrass-cli --ggcRootPath /greengrass/v2 deployment create --remove "com.example.sensehat.joystick"
Uninstall the core AWS IoT Greengrass software from the Raspberry Pi
Follow the steps in this document to uninstall the core AWS IoT Greengrass software from your Raspberry Pi.
Conclusions
With the help of this article, you have learned how to use AWS IoT Device Shadow and AWS IoT Greengrass services to build a robust solution for managing the health of IoT devices, whether locally or remotely. You can now focus on your business logic and let these two AWS services do the heavy lifting of device state management anywhere. These two custom components are created and deployed locally on the device. The next step could be to make them available in AWS IoT Greengrass to be deployed to more devices. You can follow steps 5 and 6 in the AWS IoT Greengrass document to do this.


